Ceramic Decal Questions & Answers

How are ceramic decals applied?
Make sure your piece is free of dust, dirt, fingerprints, etc. Remove the wax paper or film divider from the decal (if there is one) and discard. Trim around the decal fairly close to the design. Have a soft cloth or squeegee handy. Put about an inch of warm water in a shallow dish that is big enough for the decal to lay flat. Soak the decal in warm water until it slides easily off the paper backing which usually takes 20 to 30 seconds. Hold the decal, while still on the paper backing, near where you want it and slide the decal off the backing onto your piece. Use a soft cloth or squeegee to remove all the water and air from underneath the decal. Turn piece this way and that way in good lighting to make sure there is nothing trapped beneath the decal and that the decal is wrinkle-free. Any water or air that remains trapped under the decal may cause the decal to burn off in the area during kiln firing. Let the decal dry 24 hours before firing in a kiln.
.
What can ceramic decals be applied to and not fired?


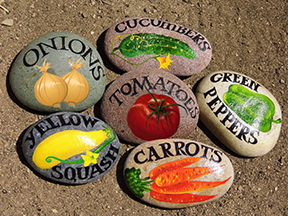


Ceramic decals can be applied to candles, soap, rocks, painted surfaces, wood, metal, plastic, and more. Apply the decal onto the piece as instructed above. Once dry, two or three coats of a clear sealer can be applied for added protection. The decals on soaps and candles do not require a clear sealer and the decals will stay intact while the candle burns and the soap is used. Seal anything that will be outside to protect them from the elements. Decals applied to painted surfaces can be sealed or not, depending on the usage. Items with unfired decals cannot be used in the microwave, put in the dishwasher, or left to soak in a sink of water. Wipe with a slightly damp cloth to clean items with unfired decals.

How are ceramic decals fired?
Different kilns require different firing schedules. Learn what works for you and what does not. Keep notes. Repeat the things that work and learn from the things that don't. You are creating a work of art...and it may at times feel like work, but once you've got that wonderful, beautiful, amazing piece of art in all its glory, it will be worth the effort. Preheat is imperative. Decals must burn off slowly. Leave kiln lid open 1" or 2"; leave all peep holes open for ventilation. For the best results, firing must be slow and well ventilated with the first 800 degrees being the most critical.
Cone 017 will work with any manufacturer's decals and Cone 018 for gold firings
Set Firing Speed for MEDIUM (computerized kiln) or Turn ALL switches on LOW (manual kiln)
Leave kiln lid cracked about 1” and leave all “peep holes” open
Start kiln
After 1 hour turn all switches to Medium on manual kiln; or to High on manual kiln
When kiln stops smoking, close lid
When kiln shuts off, leave lid closed for 2 hours; then you can either leave the lid closed or crack it 1”
Let kiln cool down naturally for best results
If after firing the decal appears gray or rubs off, it was not fired hot enough. When fired properly decals will be glossy and will not scratch off. Don't despair. You can re-fire to a higher temperature if the initial results were not satisfactory.

How long will unfired ceramic decals last?
Decals can have an indefinite shelf life when stored at a fairly constant room temperature (between 68º and 74º F and 50-65% humidity). Store your decals 'on edge', rather than in piles. Due to the pressure, decals that are stored in stacks may stick together.

Please feel free to contact me at captiveillusions@yahoo.com if you have any further questions.